Client List
July 29, 2024
all plans
The Client List window provides access to all client records.
Accessing the Client List
You can access the Client List from the main toolbar or the menu.
- Click the
 (Client List) icon on the toolbar.
…or… - Click
 Clients in the menu.
Using the Client List
Before a client is selected, buttons are available at the top of the window to toggle between the ![]() Table View or
Table View or ![]() Dropdown View, access the Tutorial for this feature, and to create a + New client.
Dropdown View, access the Tutorial for this feature, and to create a + New client.
Dropdown View
When in Dropdown View, you can click the drop-down arrow to select which client you want to view. Typing in the lookup field will also display search suggestions, allowing you to select from a shorter list of clients.
Set the Include All option to include inactive clients in the drop-down list.

Select a client to display the Client View. For additional information, see the Clients View article.
Table View
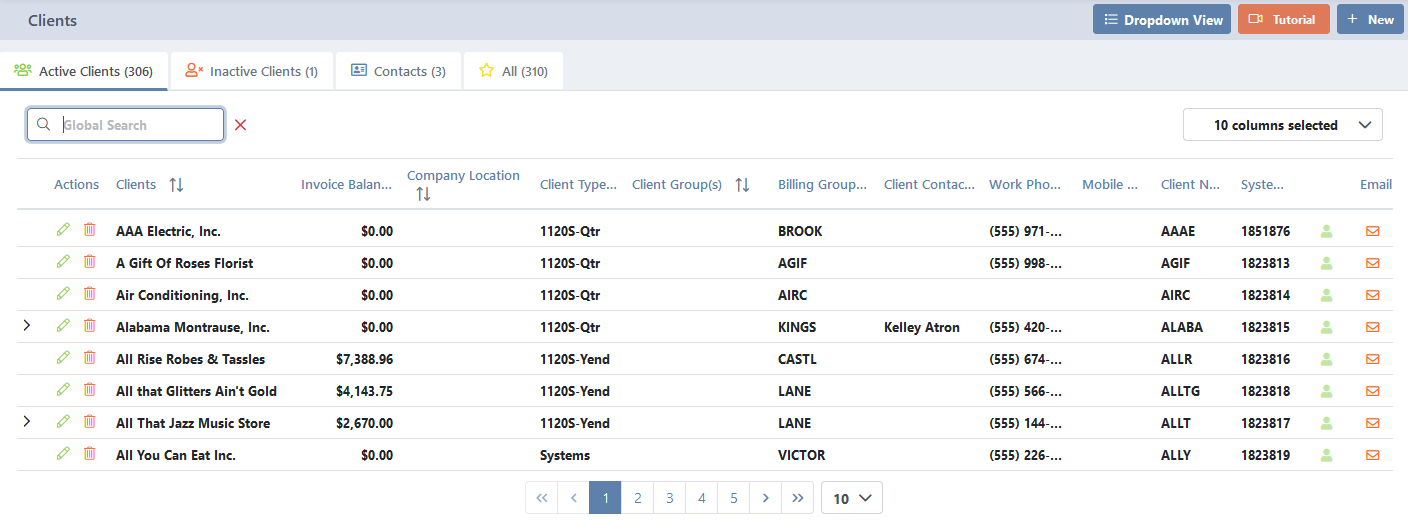
When in Table View, you can view a list of your clients and perform various actions.
This view is divided into four tabs that filter specific clients or contacts: ![]() Active Clients,
Active Clients, ![]() Inactive Clients,
Inactive Clients, ![]() Contacts, and
Contacts, and ![]() All.
All.
The Global Search field can be used to locate records containing specific text. Once specified, an indicator will be displayed showing how many records contain that text. To clear the search, click the red X icon to the right of the field.
Some columns in the List are optional. The Choose Columns field allows you to optionally select or clear the Invoice Balance, Company Location, Client Type, Client Group(s), Billing Group, Client Contact, Work Phone, Mobile, Client Number, System ID, Email, Billing Partner, Staff Assigned, Business City, Business Street, Business Street 2, Business State, Business Zip, Open Time, and/or Open Expenses check boxes, which will display or hide these columns.
You can click on the header of many columns to sort the records shown by the values in that column. Click the header again to reverse the sort.
Click the ![]() (Show Client Contacts) icon to open the Contacts window, allowing you to view contacts associated with the client.
(Show Client Contacts) icon to open the Contacts window, allowing you to view contacts associated with the client.
The Actions column provides options to perform an action on a specific entry.
- Click the
 (Edit) icon to open the Client View. For additional information, see the Clients View article.
 - Click the
 (Delete) icon to delete the current client. You will be prompted to confirm the action.
Click the ![]() (Email) icon in to start an email to the client’s contact in your default email application.
(Email) icon in to start an email to the client’s contact in your default email application.

Adding a Client
To add a new client:
- Open the Client List.
- Click + New.
- Enter the applicable client information.
- Click ✓ Save.
Changing a Client
To change an existing client:
- Open the Client List.
- Select a client (or click the
 [Edit] icon) to display the Client View.
For additional information, see the Clients View article.