
Reviewing Email
June 16, 2025
plus
With Email integration, you (and optionally your staff) can access an email account from Google, Microsoft, or IMAP server directly in Mango via the Email option on the menu. When accessing your email, you can view and compose email, assign an email to a client or project, and send files via MangoShare.
Reviewing Email
You can access your email inbox from the menu.
- Click
 Email.
 - Click on a configured email address.
Your email folders are shown on the left side of the screen. Selecting any email will display the body and attachments on the right. You can then read and reply to your email as well as assign emails to projects and clients or send a file via MangoShare.
Assigning Email
Clicking on an email loads the email in the right pane and provides the Assign drop-down with the following options:
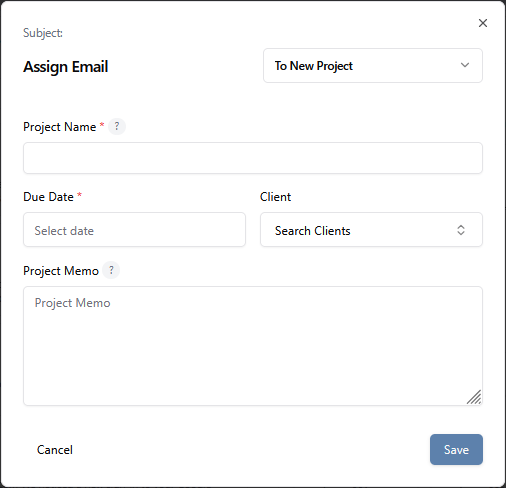
To New Project
The following fields are available in the Assign Email window.
- Project Name – Enter the name of the project. This field is automatically populated with the subject of the email.
- Due Date – Enter the desired due date for the project.
- Client – Optionally select the client to which the project should be associated.
- Project Memo – Optionally enter a memo for the project.
Click Cancel to close out of the Assign Email window, or click Save to save the project.
To Existing Project
The following fields are available in the Assign Email window.
- Project Name – Select the desired project.
- Note – Optionally enter a note for the project.
Click Cancel to close out of the Assign Email window, or click Save to save the project.

Note: When a user selects the To Existing Client option, if Mango identifies that the specified email/domain is linked to multiple contacts within the selected client, the following validation alert may be shown.
Linked to Multiple Contacts: This email address is linked to multiple contacts.
“This contact will be the associated contact for this email address going forward.”
To Existing Project as Task
The following fields are available in the Assign Email window.
- Project Name – Enter the name of the project.
- Task Description – Enter a description of the task.
- Completed – Optionally toggle this option if the task should be marked as completed.
- Repeat Task – Optionally toggle this if the task should be repeated.
- Completion Date – Optionally enter a completion date if the task has been completed.
- Scheduled Date – Optionally enter the date for which the task should be scheduled.
- Due Date – Optionally enter the desired due date for the task.
- Assigned – Optionally select the user to which the task should be assigned.
- Memo – Optionally enter a memo for the project.
Click Cancel to close out of the Assign Email window, or click Save to save the task.

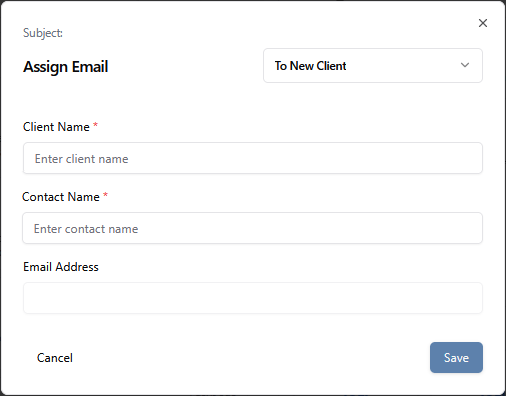
To New Client
The following fields are available in the Assign Email window.
- Client Name – Enter the name of the client.
- Contact Name – This field is automatically populated with the name associated with the email, but can be changed as needed.
- Email Address – This field is automatically populated with the email address of the associated email and cannot be changed.
Click Cancel to close out of the Assign Email window, or click Save to save the project.
To Existing Client
The following fields are available in the Assign Email window.
- Client Name – Enter the name of the client.
- Contact Name – This field is automatically populated with the name associated with the email, but can be changed as needed.
- Email Address – This field is automatically populated with the email address of the associated email and cannot be changed.
Click Cancel to close out of the Assign Email window, or click Save to save the project.

Sending Files via MangoShare
MangoShare files can be sent via Email. For additional information on sending files via MangoShare, see the Sharing Files article in the MangoShare Knowledge Base.
To send a MangoShare file via Email
- Click on your mailbox.
- Click on an email.
- Scroll to the bottom of the email and click the
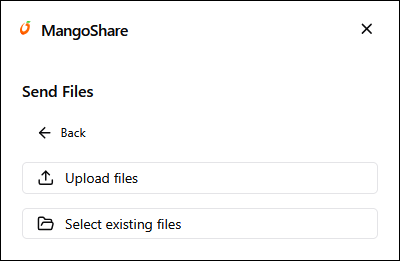
- Click Send Files.
- Click Upload files if you want to send a file not located in Mango, or click Select existing files if you want to send a file from a Workspace in Mango. (Note: When selecting Upload files, the file will be added to a Mango workspace of your choosing.)
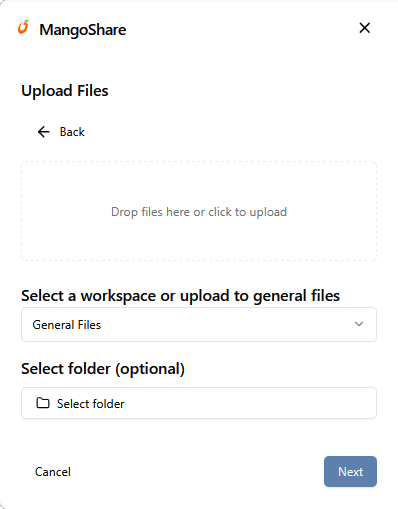
- To upload a new file
- Click Upload files.
- Drop your files in the box, or click to select files.
- Click the drop-down to Select a workspace or upload to general files.
- Optionally click Select folder (optional) to select a folder in which to store the file.
- Click Next.
- To send existing files
- Click Select existing files.
- Select a Workspace.
- Select a file.
- Click Submit.
- To upload a new file
- In the Share files window, the following settings are available:
- Upload more files to share – click to upload more files.
- Who has access – select Direct Link or Secret Question. When selecting Secret Question, you’ll be able to select a question and an enter an answer. (Note: The available options depend on the settings in MangoShare. See the Advanced Settings article in the MangoShare Knowledge Base for more information on these settings.
- Optionally select Notify when viewed if you want to receive an email when the client has viewed your email.
- Optionally select Notify when downloaded if you want to receive an email when the client has downloaded the file(s).
- Optionally select Expiration Date and enter a date if you want to remove access from the files on a specific date.
- Click Create link.
- Click Insert into Email.
- A link to download the file(s) will be inserted into the reply email. You can optionally add any desired text to the email, and then click Send Reply.
Common Questions About Email
- The option to access Email is not available. Why?
- The Email feature has recently completed development and is now in the process of being rolled out to users. If you are unable to access this feature, please contact Mango Support and they can work to make this available for you.
- How does Mango access our Outlook or Google inbox?
- Mango has partnered with Nylas, which provides management access to various calendar applications. When enabling Email Integration, you will be prompted to authorize Mango access via Nylas. For additional information about Nylas, visit their website at nylas.com/company/about/.
Learn More
The following knowledge base articles contain additional information relating to Email: