
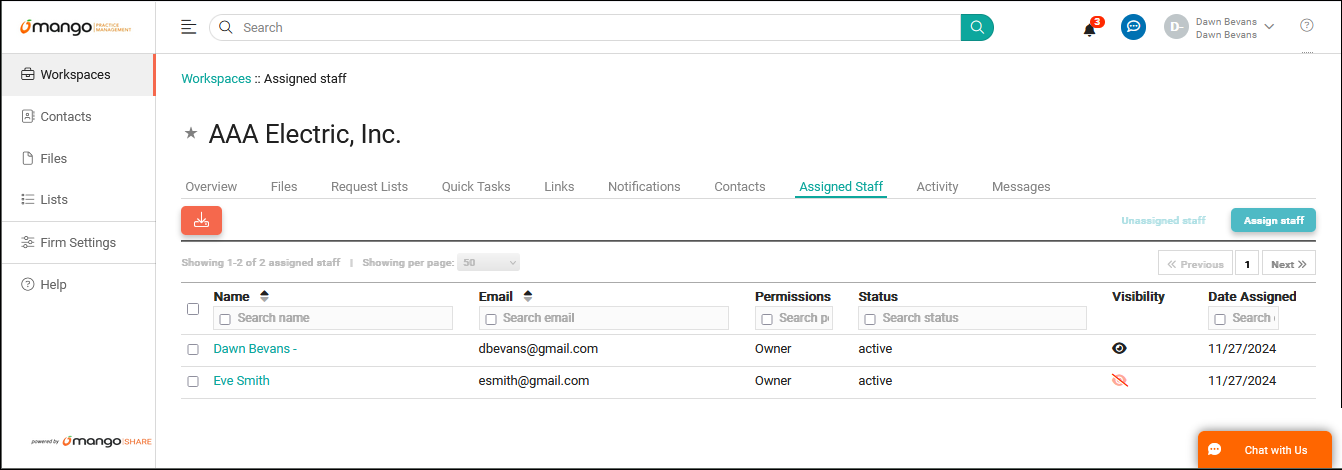
Assigned Staff
November 27, 2024
Assigning staff members to clients allows those without Owner permissions to view their Workspaces, receive notifications, and communicate with contacts.
Accessing Assigned Staff
You can access Assigned Staff via Workspaces.
- Click
 Workspaces.
 - Click the link in the Workspace Name.
- Click the Assigned Staff.
Using Assigned Staff
You can select how many Assigned Staff are Showing per page in increments of 25, 50, or 100. The << Previous and Next >> buttons can be used to move between pages.
You can search for records containing specific text within a column by selecting the check box in the column header and entering the text. To clear the search, clear the check box from the column header.
You can click on the header of the Name and Email columns to sort the records shown by the values in that column. Click the header again to reverse the sort.
Click on any of the user names to see details about the staff member.
Assigning Staff
You can assign staff to the client using the following steps.
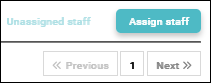
- If no staff members are assigned to this client, click Assign staff members in the middle of the page.

If there is at least one staff member assigned, click Assign staff above the list on the right.
- Select the staff members you want to assign to the client.
- Click Next.
- Click the
 icon next to each item you want a notification on. Click the
  icon to clear the notification.
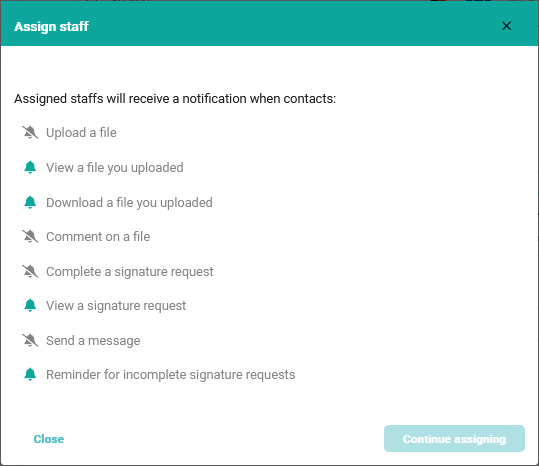
- Click Continue Assigning.
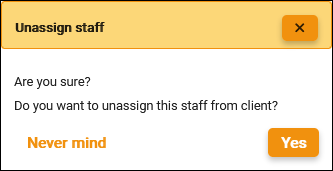
Unassigning Staff
You can unassign staff to the client using the following steps.
- Select the staff member(s) you want to unassign.
- Click Unassigned staff.

- Confirm you want to unassign the staff member.
Changing the Visibility of a Staff Member
You can change whether or not a client sees that a particular staff member is assigned to them using the Visibility column.
- Click the eye icon in the Visibility column to toggle whether the staff member is visible () or hidden () in the portal. For additional information, see the Portal article.
Assigning and Unassigning Staff in Bulk
You can assign or unassign staff for multiple clients at a time.
- Click Workspaces.
- Select the clients you want to assign or unassign staff members.
- Click Staff Setting.

- Select Assign Staff or Unassigned Staff.
Note: When unassigning staff for multiple clients, all assigned staff will be removed.
See It in Action
Learn More
The following knowledge base articles contain additional information relating to Assigned Staff: