
Workspaces Overview
November 15, 2024
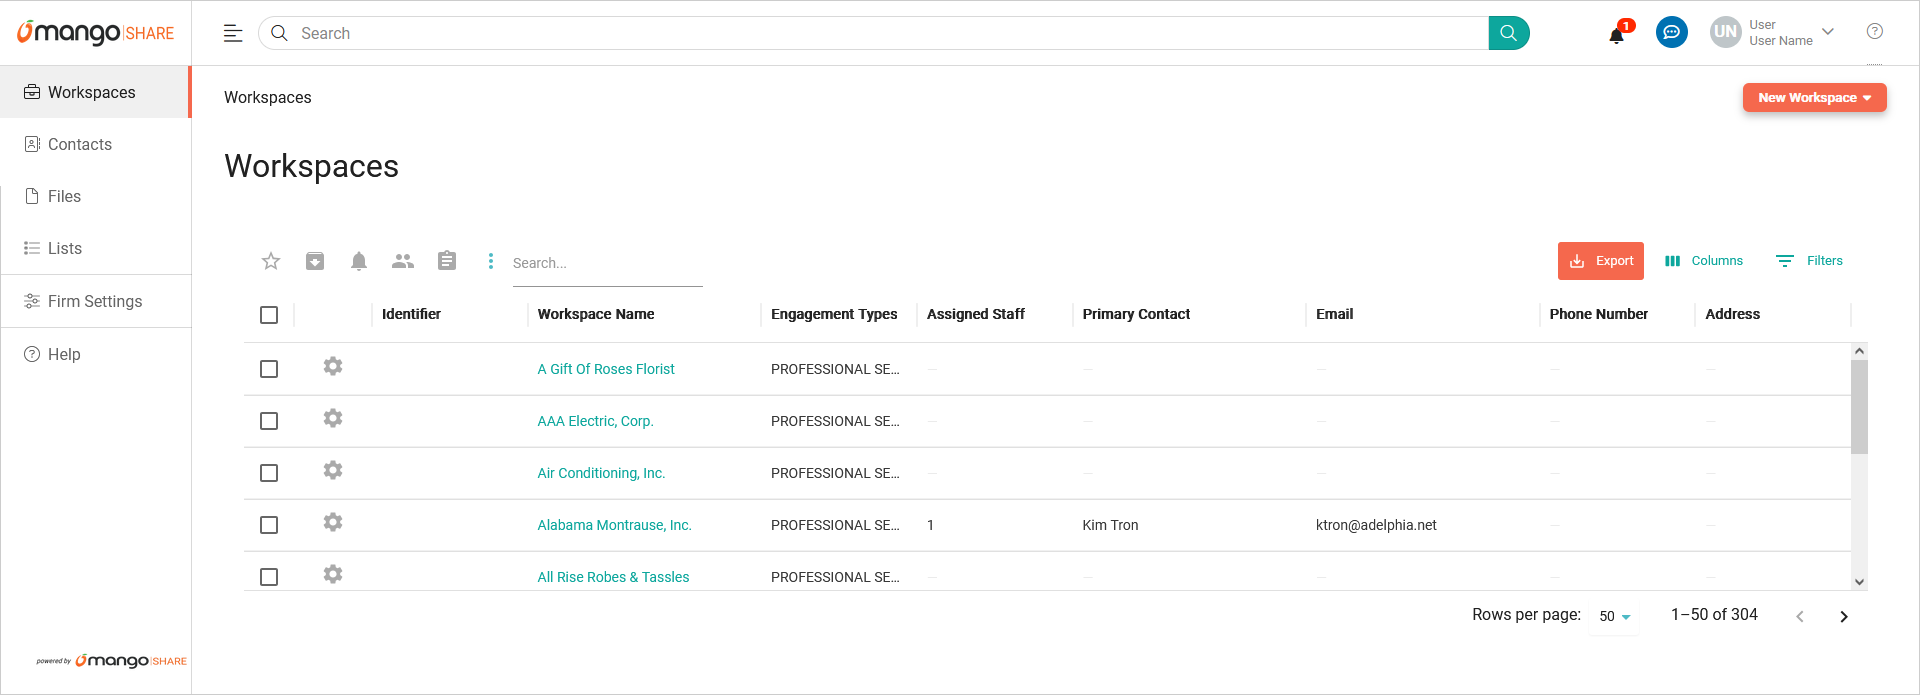
Each client in MangoShare has their own workspace. From the workspace, you can add files and contacts for a client, send file requests, and configure access to the portal. The Workspaces list is likely where you will perform the majority of the time in MangoShare, as it provides easy access to the rest of the application and its features.
Accessing Workspaces
You can access Workspaces from the menu.
- Click
 Workspaces.
Client Workspaces List
Click the ![]() (Favorites) icon to filter the list to records marked as favorites. Click the icon again to remove the filter.
(Favorites) icon to filter the list to records marked as favorites. Click the icon again to remove the filter.
The ![]() (Options) icon provides access to the Show Archive option. Click this option to show records that have been archived. These records can be deleted or reinstated as needed. While viewing archived records, the
(Options) icon provides access to the Show Archive option. Click this option to show records that have been archived. These records can be deleted or reinstated as needed. While viewing archived records, the ![]() (Options) will include a View Clients option to return to the normal list. For additional information, see the Archiving article.
(Options) will include a View Clients option to return to the normal list. For additional information, see the Archiving article.
The Search field can be used to locate records containing specific text in the Workspace Name column. To clear the search, delete the text from the field.
If you have permissions to Allow export of data in your Staff Member settings, the ![]() button can be used to export the current list as a CSV file. This file can be opened in a spreadsheet application, such as Microsoft Excel. Additional information about your settings can be found in the Staff Members article.
button can be used to export the current list as a CSV file. This file can be opened in a spreadsheet application, such as Microsoft Excel. Additional information about your settings can be found in the Staff Members article.
Columns in the List are optional. The ![]() Columns button allows you to optionally select the Check box selection, Settings, Identifier, Workspace Name, Engagement Types, Assigned Staff, Primary Contact, Email, Phone Number, and/or Address check boxes, which will display these columns. Select the Show/Hide All check box to select or clear all of the columns in this list.
Columns button allows you to optionally select the Check box selection, Settings, Identifier, Workspace Name, Engagement Types, Assigned Staff, Primary Contact, Email, Phone Number, and/or Address check boxes, which will display these columns. Select the Show/Hide All check box to select or clear all of the columns in this list.
The ![]() Filters button allows you to filter by the Identifier, Workspace Name, Engagement Types, Assigned Staff, Primary Contact, Email, Phone Number, or Address. Select a Column and Operator, then enter a Value. To remove the filter, click the
Filters button allows you to filter by the Identifier, Workspace Name, Engagement Types, Assigned Staff, Primary Contact, Email, Phone Number, or Address. Select a Column and Operator, then enter a Value. To remove the filter, click the ![]() (Delete) icon.
(Delete) icon.
You can click on the header of many columns to sort the records shown by the values in that column. Click the header again to reverse the sort. The ![]() (Menu) icon in each column header allows you to
(Menu) icon in each column header allows you to ![]() Sort By ASC,
Sort By ASC, ![]() Sort By DESC,
Sort By DESC, ![]() Filter,
Filter, ![]() Hide Column, or
Hide Column, or ![]() Manage Columns. Click on the header of the Check box selection column to select all records in the list, even if they are not shown on the current page.
Manage Columns. Click on the header of the Check box selection column to select all records in the list, even if they are not shown on the current page.
At the bottom of the window, you can select how many Rows per page are displayed in increments of 25, 50, or 100. The < and > buttons can be used to move between pages.
Adding New Workspaces
You can add new workspaces from the Workspaces list.
- Click New Workspace and select Create New Workspace to display the New Workspace window.
- Specify the Name of the client.
- Optionally enter a Client identifier and Assign Staff.
- Optionally click the
 (Include) icon next to the Engagement types to select them. To remove an engagement type, click the
  (Remove) icon.
 - Click Save.
You can add multiple workspaces by uploading a CSV file.
- Click New Workspace and select Bulk Workspace Upload to display the Import Workspace window.
- Use the Click here to download a CSV template link to download a file that can be populated with your workspace records. This file can be opened in a spreadsheet application, such as Microsoft Excel.
- Populate the clientName, engagementType, street, city, state, postal, country, and phoneNumber columns of the CSV file. Optionally populate the clientID, folderTemplate, contactFullName, contactEmail, staffFullName, and staffEmail Note that multiple contacts can be specified; however, if a contact or staff is entered, both the Full Name and Email fields are required.
- Select the CSV file in the Drop files here or click to upload
- Review the records to import and click Next.
- Optionally toggle notifications for contacts and staff by clicking the bell icon. An enabled bell (
 ) indicates that a notification will be sent, and a disabled bell (
 ) indicates no notification will be sent. For additional information about notifications, see the Global Search & Navigation article. Then click Continue Importing.
 - To add the workspace without sending an invitation to any contacts, click Upload To add the workspace and send invitations to all included contacts, click Yes, upload and send invites.
- Review the import results. Optionally click Download Report to see a list of changes made during the import. Then click Okay.
Editing Workspaces
To change existing workspaces, a few different options are available.
You can click in the Workspace Name column to open the Workspace Details window. Information about the Workspace Details window can be found in the Workspace Details article.
The (Menu) column provides options to perform an action on a specific entry.
- Click the Archive Client option to remove the record from the list. For additional information, see the Archiving article.
- Click the Mark as favorite option to add the workspace to the favorites list. While viewing a favorite workspace, the
 (Options) will include a Remove from favorites option to remove it from the favorites list.
Finally, you can select one or more workspaces in the list to enable the Batch Options. These options will perform actions on all selected workspaces.
- Click
 (Archive Clients) to archive all selected records. For additional information, see the Archiving article.
 - Click (Notification Settings), and then click Client Notifications to see the Clients Notification Settings window.
- Click (Notification Settings), and then click Staff Notifications to see the Staff Notification Settings window.
- Click
 (Staff Settings), and then click Assign Staff to see the Assign Staff window.
 - Click (Staff Settings), and then click Unassigned Staff to remove any assigned staff from the selected records. You will be prompted to confirm the action.
- Click
 (Apply Template), and then click Apply Folder Template to create folders for the selected workspaces based on a folder template.
 - Click (Apply Template), and then click Apply Request List to create a request list for the selected workspaces based on a request list template.
To set client notifications
- Select one or more workspaces in the list.
- Click (Notification Settings), and then click Client Notifications.
- Toggle notifications for contacts by clicking the bell icon. An enabled bell () indicates that a notification will be sent, and a disabled bell () indicates no notification will be sent.
- Click Save.
For additional information, see the Global Search & Navigation article.
To set staff notifications
- Select one or more workspaces in the list.
- Click (Notification Settings), and then click Staff Notifications.
- Toggle notifications for assigned staff members by clicking the bell icon. An enabled bell () indicates that a notification will be sent, and a disabled bell () indicates no notification will be sent.
- Click Save.
For additional information, see the Portal article.
To assign staff
- Select one or more workspaces in the list.
- Click (Staff Settings), and then click Assign Staff.
- Select the staff members to assign to the selected records and click Next.
- Toggle notifications for contacts by clicking the bell icon, and then click Continue assigning.
For additional information, see the Staff Members article.
To apply a folder template
- Select one or more workspaces in the list.
- Click (Apply Template), and then click Apply Folder Template.
- Click Select folder template and select the folder template.
- Optionally set the Associate with the template If the Associate with the template toggle is on (
 ), changes to the folder template will automatically be applied to the selected workspaces. If the Associate with the template toggle is off (
 ), folders for the selected workspaces will be created based on the selected folder template, but changes to the folder template will not affect the workspaces.
 - Click Apply Template.
For additional information, see the Files Overview article.
To apply a request list
- Select one or more workspaces in the list.
- Click (Apply Template), and then click Apply Request List.
- Click Select request list and select the request list template.
- Click Apply Template.
For additional information, see the Request Lists and Overview of File Links articles.
Common Questions About Workspaces
- Can we delete a workspace we no longer need?
- You can archive a workspace to remove it from the list; however, this preserves all of the client information and files. If necessary, you can delete a workspace that has been archived. This action is permanent; all information and files for the workspace will be lost.
To delete an archived workspace permanently
- Click the (Options) icon at the top of the Workspaces list and select Show Archive.
- Select the workspace and click Delete Clients.
- Click Delete to confirm.
For additional information, see the Archiving article.
- I can’t see All Workspaces, only My Workspaces. Why is this?
- Users without Owner permissions do not have rights to workspaces they are not assigned. Select My Workspaces to see a list of clients you are assigned. If you need access to additional workspaces, a user with Owner access can assign you to that workspace, or they can change your permission level.
See It in Action
Learn More
The following knowledge base articles contain additional information relating to workspaces: