
Understanding Billing Rates
August 19, 2024
all plans
Mango allows for complete flexibility and total control of how you establish billing rates.
How Rates Work
Mango has a hierarchy of how rates are assigned to a time or expense entry, which allows you to set rates for certain clients, activities, or users, and override these as needed for individual transactions. Rates are applied in the following order:
- At the highest level, if a Client Rate Template is assigned to the client, that is used.
- Next, if a Client and Activity Rate Template is assigned to the client, that is used.
- Then, if an Activity Rate Template is assigned to the activity, that is used.
- Otherwise, if a default Rate is assigned to an activity, that is used.
- Finally, we fall back to the default Rate for a user.
As you can see, there are a number of ways to use rates. Many firms will only assign rates to their users, and all clients will use those rates regardless of the type of client or what activity is performed. Slightly more complicated, but some firms will assign rates to specific activities that are different than their default rates, which override all user rates when performing that activity. However, anything more complicated than this will make use of rate templates, which allow users to be assigned a Staff Rate Level, and this level can have different rates for different clients, activities, or a combination of both.
Configuring Rates
Rates can be controlled using rate templates, which allow you to specify the rate based on the client, activity, and user; to use a standard rate based on the activity; or to use a standard rate for a user. These can be combined, so the activity rate overrides the user’s rate, and rate templates override those rates.
- Setting up Staff Rate Levels
- Setting up Rate Templates
- Assign Client Rates
- Setting Activity Rates
- Setting User Rates
Setting up Staff Rate Levels
You can access Staff Rate Levels from the header at the top of the application.
- Click
 (Settings).
 - Click
 General Settings.
 - Click the
 Rate Templates tab.
 - Click Manage.
- Click the
 Assign Staff Levels tab.
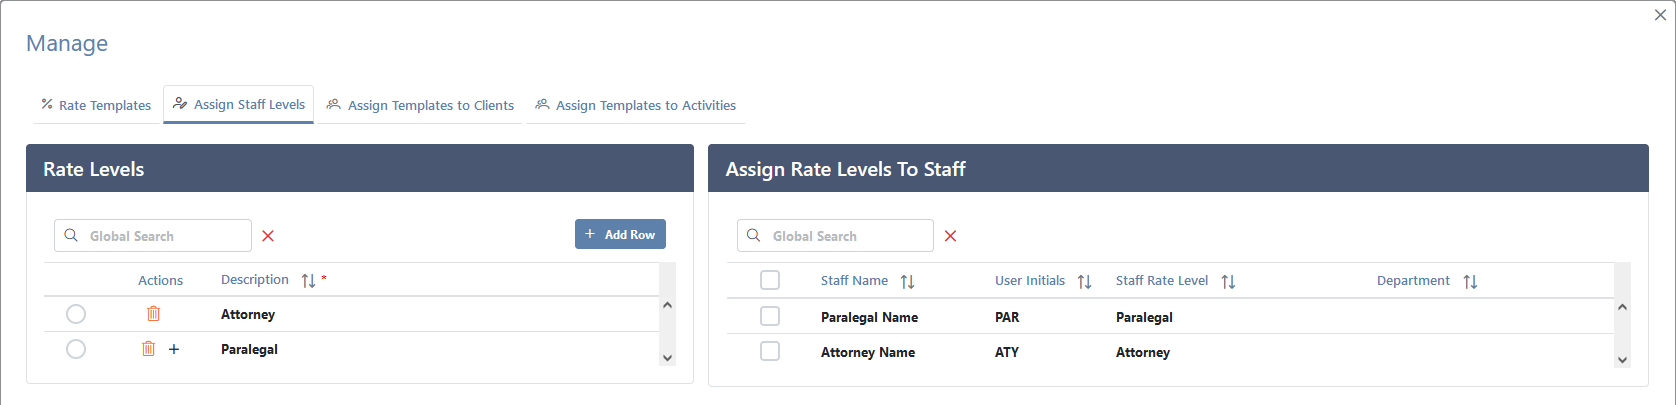
To add a new rate level:
- In the Rate Levels pane, click + Add Row.
- Specify the Description.
- Click ✓ (Apply).
To assign staff to a rate level:
- In the Rate Levels pane, select the rate level.
- In the Assign Rate Levels To Staff pane, select the staff member(s) to assign to the rate level.
- Click Batch Options and select
 Apply Selected Rate Level.
To remove staff member(s) from a rate level you can select the batch option of  Clear Rate Levels.
Setting up Rate Templates
You can access Rate Templates via General Settings.
- Click (Settings).
- Click General Settings.
- Click the Rate Templates tab.

To add a new template:
- Click Manage.
- On the % Rate Templates tab, click + Add Row.
- Specify the Template Name.
- In the Template Type field, select Client Rate Template – All Activities, Activity Rate Template – All Clients, or Client & Activity Template – Combinations.
- Click ✓ (Apply).
If a rate template is not used, you can click  (Delete) on this window to remove it.
To configure a rate template:
- On the Rate Templates tab, in the Select Rate Template field, select the template.
- In the Rate Template Details pane, click + Add Row.
- If configuring a Client & Activity Template, select the Activity.
- Select the Staff Rate Level.
- Specify the Hourly Rate.
- Click ✓ (Apply).
- Repeat steps a – d for each rate.
- In the Staff Rate Level Exceptions pane, optionally click + Add Row to override the default staff level for a staff member when using this rate.
- In the Staff Name field, select the user.
- Select the Staff Rate Level.
- Click ✓ (Apply).
- Repeat steps a – c for each staff member that will use a different level than their default.
The Global Search field can be used to locate records containing specific text. Once specified, an indicator will be displayed showing how many records contain that text. To clear the search, click the red X icon to the right of the field.
You can click on the header of many columns to sort the records shown by the values in that column. Click the header again to reverse the sort.
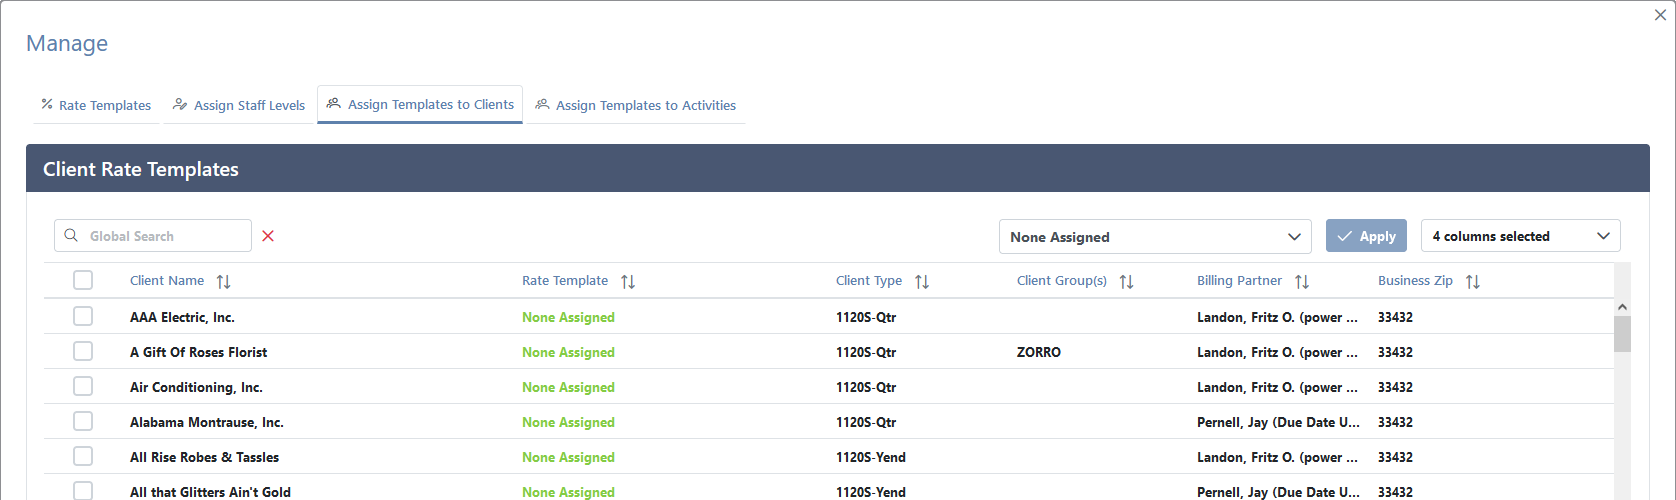
Assign Client Rates
You can assign (or unassign) rate temples to a client from Rate Templates.
- Click (Settings).
- Click General Settings.
- Click the Rate Templates tab.
- Click Manage.
- Click the
 Assign Templates to Clients tab.
 - Select the Rate Template to assign, or select “None Assigned” to remove the rate template.
- Select the client(s) to assign the rate templates to.
- Click ✓ Apply.
Setting Activity Rates
You can access Activities from the header at the top of the application.
- Click (Settings).
- Click General Settings.
- Click the
 Activities tab.
 - Click the
 (Edit) icon in the Actions column.
 - To use a default rate, specify the amount in the Bill Rate field.
…or…
To use a rate template, select it in the Rate Template field. - Click ✓ Save.
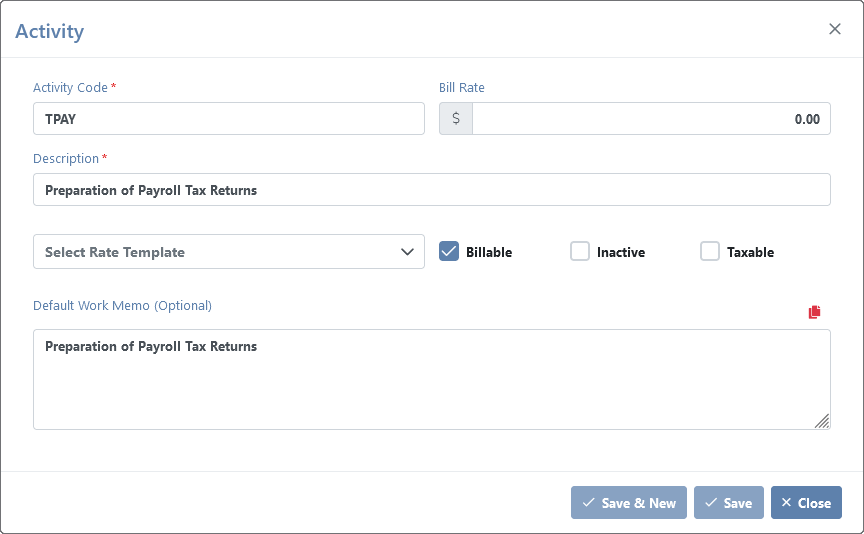
For additional information, see the Activity Settings topic.
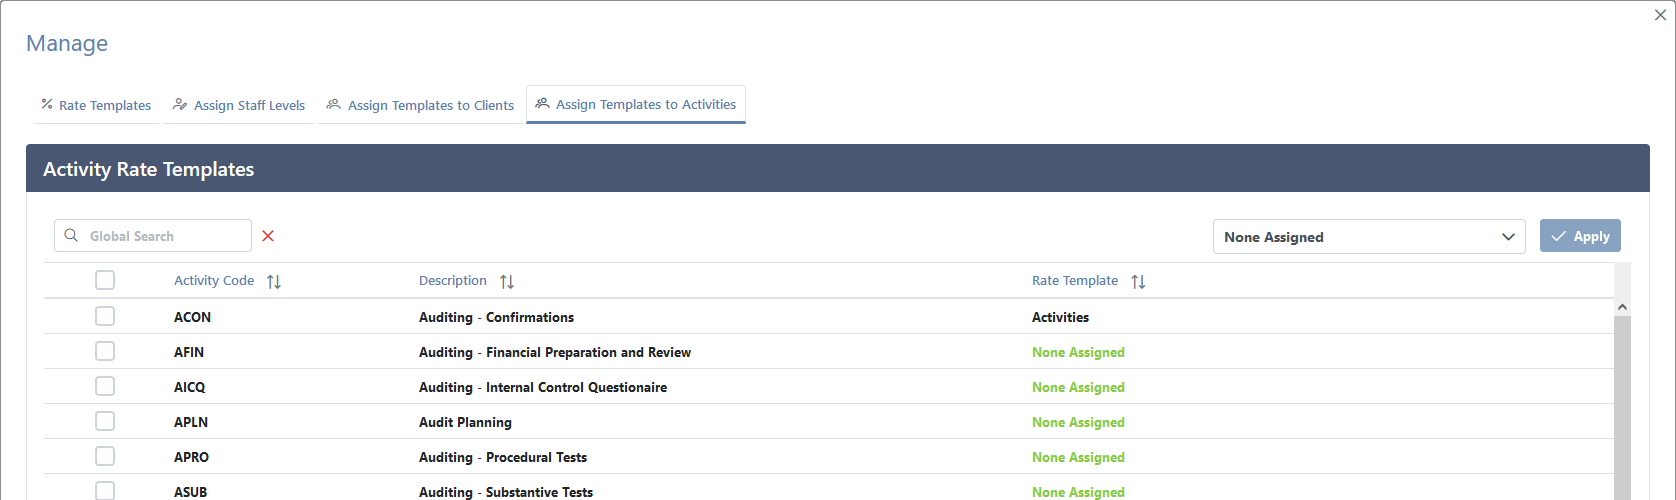
Setting Multiple Activity Rates:
You can also assign (or unassign) a rate temple to multiple activities at once.
- Click (Settings).
- Click General Settings.
- Click the Rate Templates tab.
- Click Manage.
- Click the Assign Templates to Activities tab.
- Select the Rate Template to assign, or select “None Assigned” to remove the rate template.
- Select the activities to assign the rate templates to.
- Click ✓ Apply.
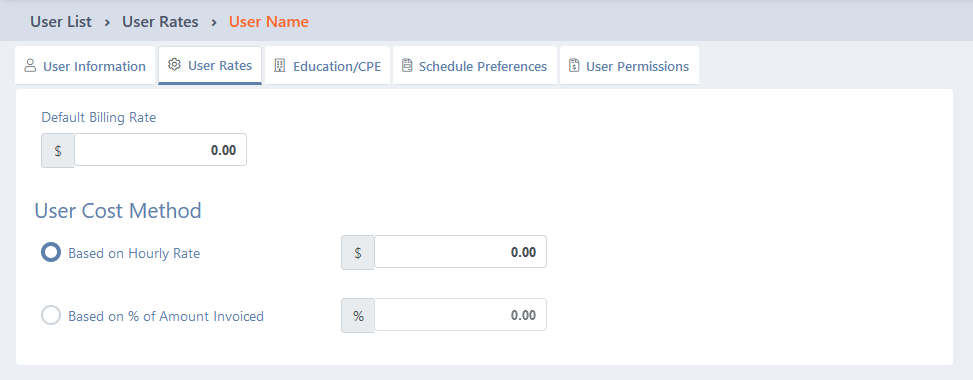
Setting User Rates
- Click (Settings).
- Click
 Users/Team Members.
 - Click the (Edit) icon in the Actions column.
- On the User Rates tab, specify the amount in the Default Billing Rate field.
- Select whether costs will be Based on Hourly Rate or Based on % of Amount Invoices, and specify the amount or percentage.
- Click ✓ Save.
For additional information, see the Users/Team Members topic.
See It in Action
Learn More
The following knowledge base articles contain additional information relating to billing rates: