Timers
July 17, 2024
all plans
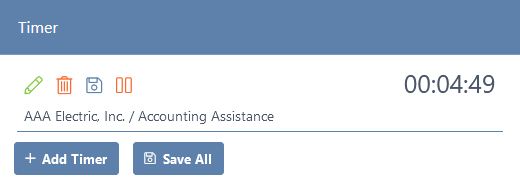
Timers are a great tool for quickly creating time records. There is no limit on the number of timers that can be started, paused, and stopped. Timers automatically start running when created. Once you finish running a timer, it is converted to a time entry where you can modify the time record before saving.
Accessing Timers
You can access timers from the main toolbar.
- Click
 Timer.
Once a timer is created the timer icon will change to a red color indicating that you have a timer available.
Adding a Timer
- Click
 Timer.
 - Click + Add Timer.
- The Hours field will automatically start incrementing as the timer is running.
- Select the Client. Additional information about clients can be found in the Overview of Clients and Engagements article.
- Select the Engagement and Activity. Additional information about engagements can be found in the Overview of Clients and Engagements topic, and additional information about activities can be found in the Activity Settings article.
- Specify the Work Description performed for this time. You can type @ (ampersand) to choose a Shortcut to add to the memo. Information about Shortcuts can be found in the Shortcut Codes article.
- Optionally add a Private Memo. Text in this field will not be included on an invoice.
- Click ✓ Save to close the Add Timer window. The timer will continue to run in the Timer list.

Pausing or Starting a Timer
- Click
 Timer.
 - Click
 (Pause) to pause a timer, or click
  (Start) to run the timer.
The timer can also be paused or started by editing the timer and clicking the ![]() (Pause) or
(Pause) or ![]() (Start) icons next to the Hours field.
(Start) icons next to the Hours field.
Editing a Timer
- Click
 Timer.
 - Click
 (Edit) on the desired timer row.
 - Make any necessary changes.
- Click ✓ Save to close the Add Timer window.
Converting a Timer to Time Entry
- Click
 Timer.
 - Click
 (Save) on the desired timer row.
 - Make any necessary changes.
- Click + Convert to Time Entry.
- Complete the Time Entry and click ✓ Save & Close. Additional information about this window can be found in the Time Entry article.
Alternatively, you can convert all timers to time entry at once:
- Click
 Timer.
 - Click
 Save All.
The timer will be removed from the timer list, and will be available in the Time Sheet for review. Additional information about working with time entry can be found in the Time Sheet Entry article.
Deleting a Timer
- Click
 Timer.
 - Click
 (Delete) to delete the timer.
Note: Deleted timers cannot be recovered, but a new Time Entry can be created for the same duration. Additional information about adding a Time Entry can be found in the Time Entry article.

Common Questions About Timers
- Can I run multiple timers at once?
- Yes, depending on your firm settings, multiple timers can be run. Additional information about the Number of Allowed Timers option can be found in the Overview of General Settings topic.
- Will a timer stop automatically when starting a new timer?
- This depends on your firm settings. Additional information about the Auto-Pause Timer option can be found in the Overview of General Settings topic.
Learn More
The following knowledge base articles contain additional information relating to Timers: