Getting Around in Mango
August 27, 2024
all plans
Once you are signed into Mango, you can access the various parts of the software using the toolbar and menu.
Main Toolbar

The main toolbar is always shown at the top of the window, and includes access to common features, as well as settings only available to users with the Administrator role, and preferences for the current user.
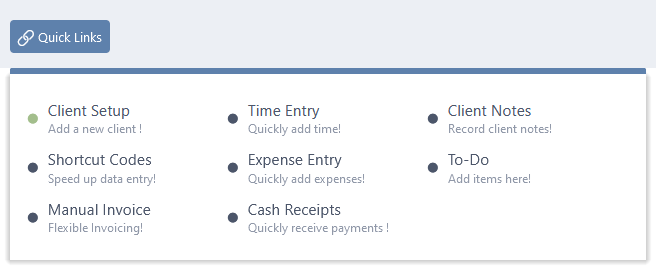
The ![]() Quick Links menu provides easy access to some of the most often used features in Mango. For additional information, see the Quick Links article.
Quick Links menu provides easy access to some of the most often used features in Mango. For additional information, see the Quick Links article.

The  (Refresh) icon can be used to reload information on the current page.
The  (Toggle Menu) icon is used to position the Menu.
The  (Timer) icon is used to access the Timer list, start a timer, or pause a timer. Timers can then be used to create time entry records. For additional information, see the Timers article.
The  (Client List) icon opens the Clients List, where you can select a client using the Dropdown View or use the Table View to see a list of all clients. For additional information, see the Client List and Clients View articles.
The  (Appointments) icon displays the Scheduling window, which contains a calendar of meetings for any selected staff members. For additional information, see the Scheduling article.
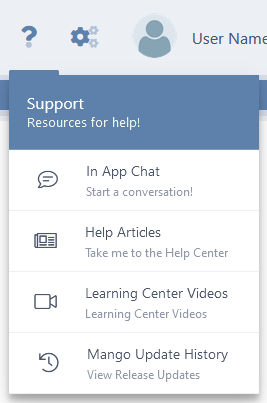
The  (Support Options) icon displays a menu that allows access to an in app chat feature to get assistance with any issues, help articles like this one, videos, and a list of recent updates to Mango.

The  (Settings) icon is only shown for users with the Administrator role, and displays a menu that provides access to settings and utilities used in Mango. Additional information can be found in the Overview of General Settings topic.
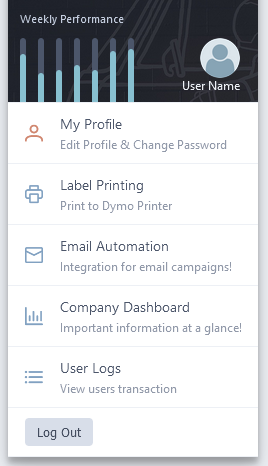
Clicking on your user name provides access to a menu that displays your weekly performance, provides access to your preferences, and other features. For additional information, see the User Profile topic.

Menu

The menu can be shown at the top of the window below the main toolbar, or on the left. The location is toggled using the  (Toggle Menu) icon on the main toolbar. When docked to the side of the window, the menu can be expanded or collapsed by mousing over the menu, and locked open or unlocked using the
  (Toggle Menu) button.
The  Dashboard menu provides access to the Home Dashboard and, if integrated, the Inbox. For additional information, see the Home Dashboard topic.
The  Clients menu opens the Clients List, where you can select a client using the Dropdown View or use the Table View to see a list of all clients. For additional information, see the Clients View article.
The  Engagements menu provides access to the Engagement List and Engagement Letters. For additional information, see theOverview of Clients and Engagements, Engagement List, and Engagement Letters topics.
The  Time & Expense menu provides access to the Time Sheet Entry, Time Card Entry, Batch Time Entry, and Expense Manager windows. For additional information, see the Overview of Time Tracking, Time Sheet Entry, Time Card Entry, Batch Time Entry, Expense Entry, and Expense Manager topics.
The  Billing & Invoicing menu provides access to the Manual Invoice, Recurring Invoice, Batch Invoice, Retainer Invoice, Invoice Review, and Apply Time to Invoices windows. For additional information, see the Invoicing Overview, Manual Invoice, Recurring Invoice, Batch Invoicing, Retainer Invoice, Invoice Review, and Apply Time to Invoices topics.
The  Accounting menu provides access to the Cash Receipts, Make Deposit, Edit Deposit, and Electronic Payments windows. For additional information, see the Cash Receipts, Deposits, and Electronic Payments topics.
The  Scheduling menu opens the Scheduling window, which contains a calendar of meetings for any selected staff members. For additional information, see the Scheduling article.
The  Reports menu opens the Report Center, where you can run Statements and various Reports. For additional information, see the Reports Overview, Sample Accounting Reports, Sample Invoicing Reports, Sample Time & Expense Reports, Sample Performance Reports, Sample Payroll Reports, and Sample Master List Reports articles.
The  Project Management menu provides access to the Project Management Dashboard, and from there the other Project Management features of Mango. For additional information, see the Overview of Project Management article.
The  Document Management menu opens MangoShare, if the Activate MangoShare Integration option is set on the MangoShare Integration tab of General Settings. This allows you to request and share documents with your clients, as well as request electronic signatures. For additional information, see the Overview of General Settings and Document Management articles, as well as the full MangoShare Help Center.
See It in Action
Learn More
The following knowledge base articles contain additional information about Mango features: